Spherical Panoramas: How to Make a Little Planet
Spherical panoramas: you see them quite often nowadays. Little planets, they are sometimes called. Photos, apparently made with a huge wide-angle lens, on which the Earth seems to have shrunk so much that there’s room for only oa few buildings.
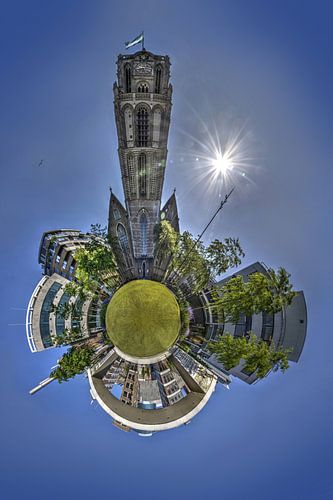
Only eight months ago I made my first spherical panorama, of the Schouwburgplein in Rotterdam. These days I even make them in commission. Time for a little tutorial.

The Big Picture
The great thing about spherical panoramas is that they give an overall view. They show a place in one single glance, unlike tradional widescreen panoramas where you have to pan with your eyes from left to right and back to see the whole picture. And unlike reality where you have to turn around 360 degrees to see everything.

Landscape and portrait
You don’t need advanced photographic equipment to make these panorama’s. Even mobile phones nowadays have a panorama tool. I use a Nikon D5100 with an 18-105 mm lens at its widest angle. The first panoramas I created were stitched together from around twelve photos in landscape orientation. Later I switched to portrait orientation, because I wanted to capture more of the sky and the ground around my feet. As a result I now usually need around eighteen photos. The latest panoramas I’ve made are even composed of 24-30 landscape oriented images, in two rows with overlap on top of each other.

Photomerge
For the stitching part I use Photoshop’s excellent photomerge tool, to be found under file → automate. In most cases the option “cylindrical” works best; I check the vignette removal and geometric distortion removal boxes. And then I go and make some coffee because depending on your computer power the process can be time consuming.

Second Round
To make both ends of the panorama blend well, I usually do a second round. I cut the picture at an arbitrary location more or less halfway and have photomerge stitch the resulting two images. This usually takes much less time.

Polar coordinates
Finally I spherize the panorama by changing the image to a square 1:1 ratio, rotating it 180 degrees and applying the filter polar coordinates, to be found under filter → distort. Only the center and the edges of the image need some manual additions, because those areas were not part of the composing photographs.

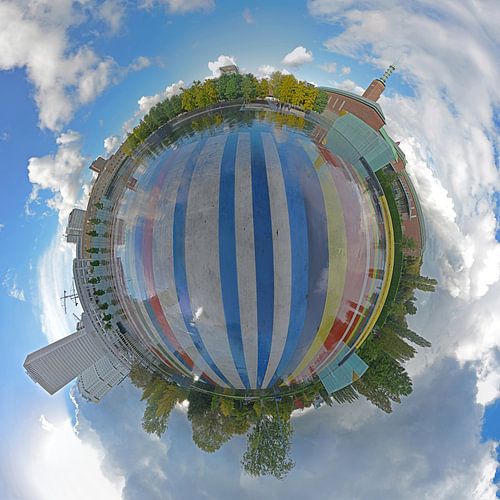
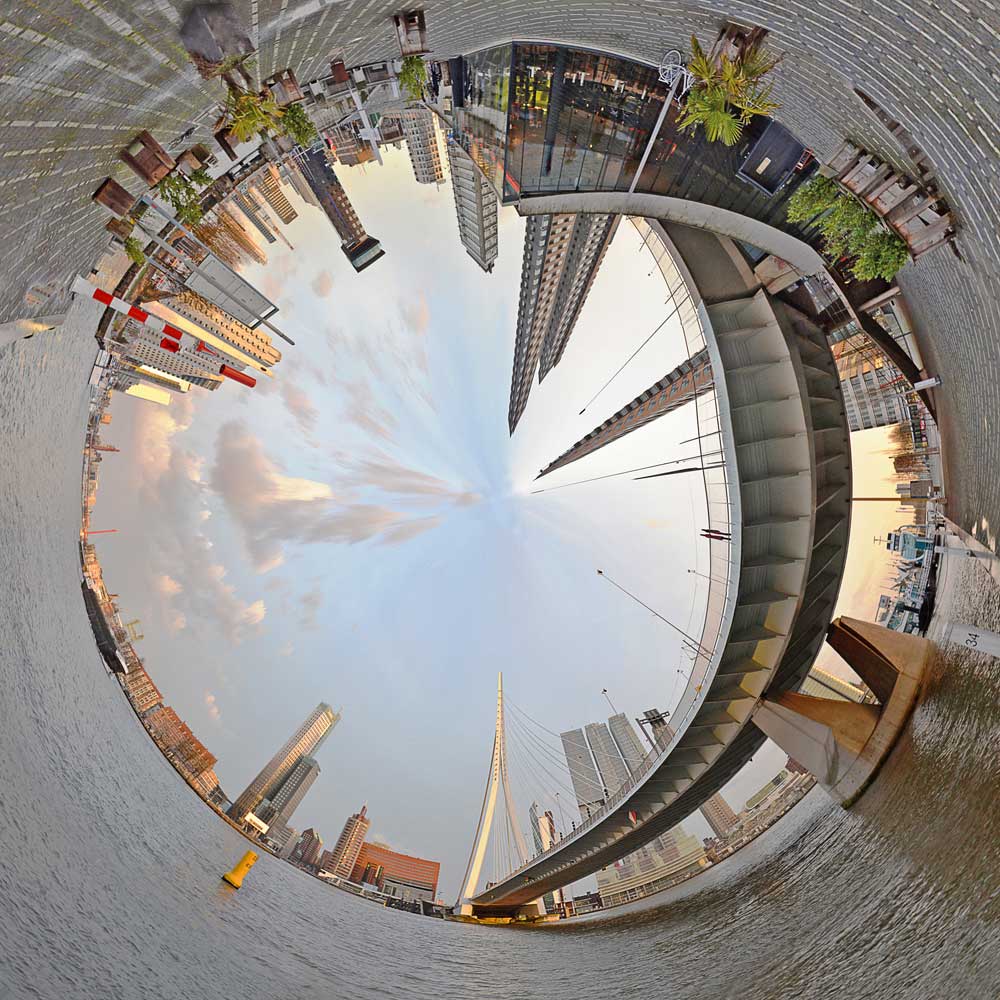
Spheres and tubes
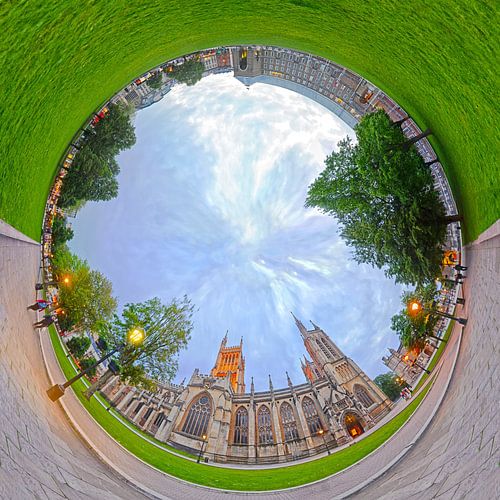
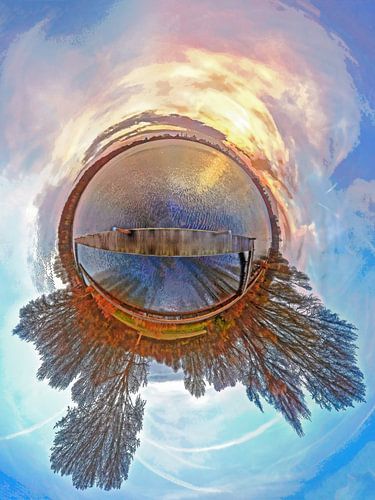
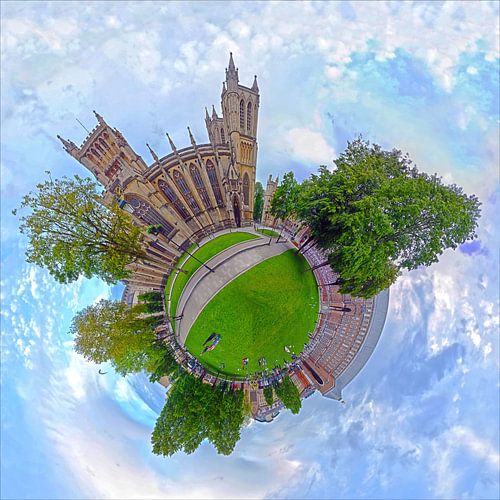
As an alternative I sometimes make tubular panoramas. Those can be made following all the steps described above, except for the 180 degrees rotation. Like for example the panorama I made of Erasmus Bridge, shown above. Or the panorama below I composed of photos made at dusk on College Green in Bristol, England. In the upper right the City Hall, at the bottom Bristol Cathedral.

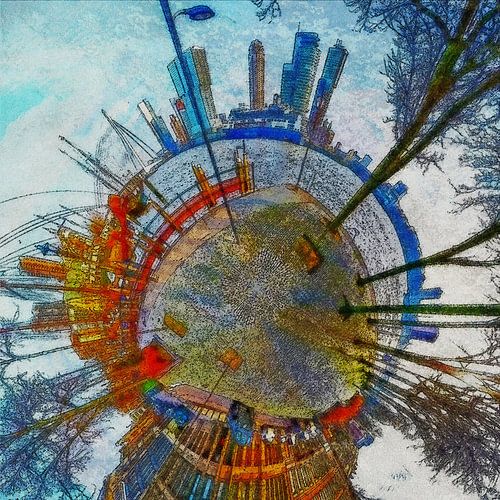
Paintified spherical panorama
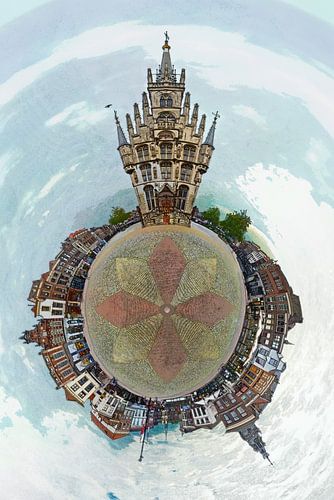
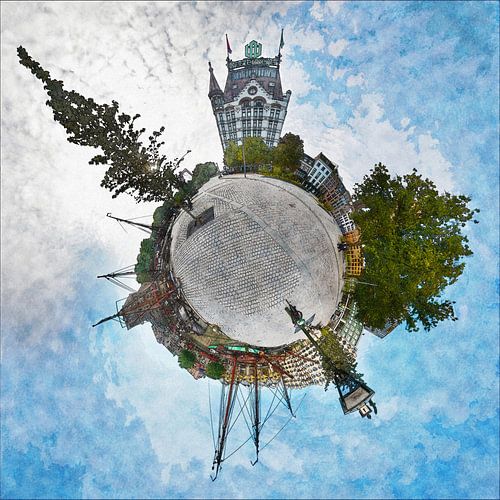
I often apply a multitude of other Photoshop filters after which the image looks like something in between a painting and a comic book drawing, rather than a photo. Look for example at this paintified panorama for which I took position in the center of the star in the pavement in front of the Town Hall on the Market Square in Gouda.

Making of
Photomerge, the choice between sphere or tube, paintification, it all comes around again in this Making of. In a little less than two minutes, 29 photos merge into a spherical panorama of Gelderseplein, the square next to the Old Harbour in Rotterdam

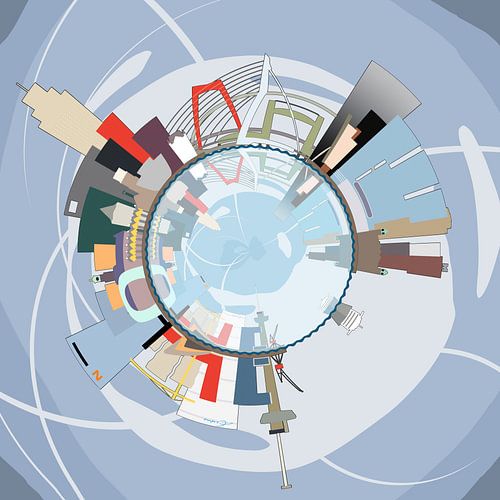
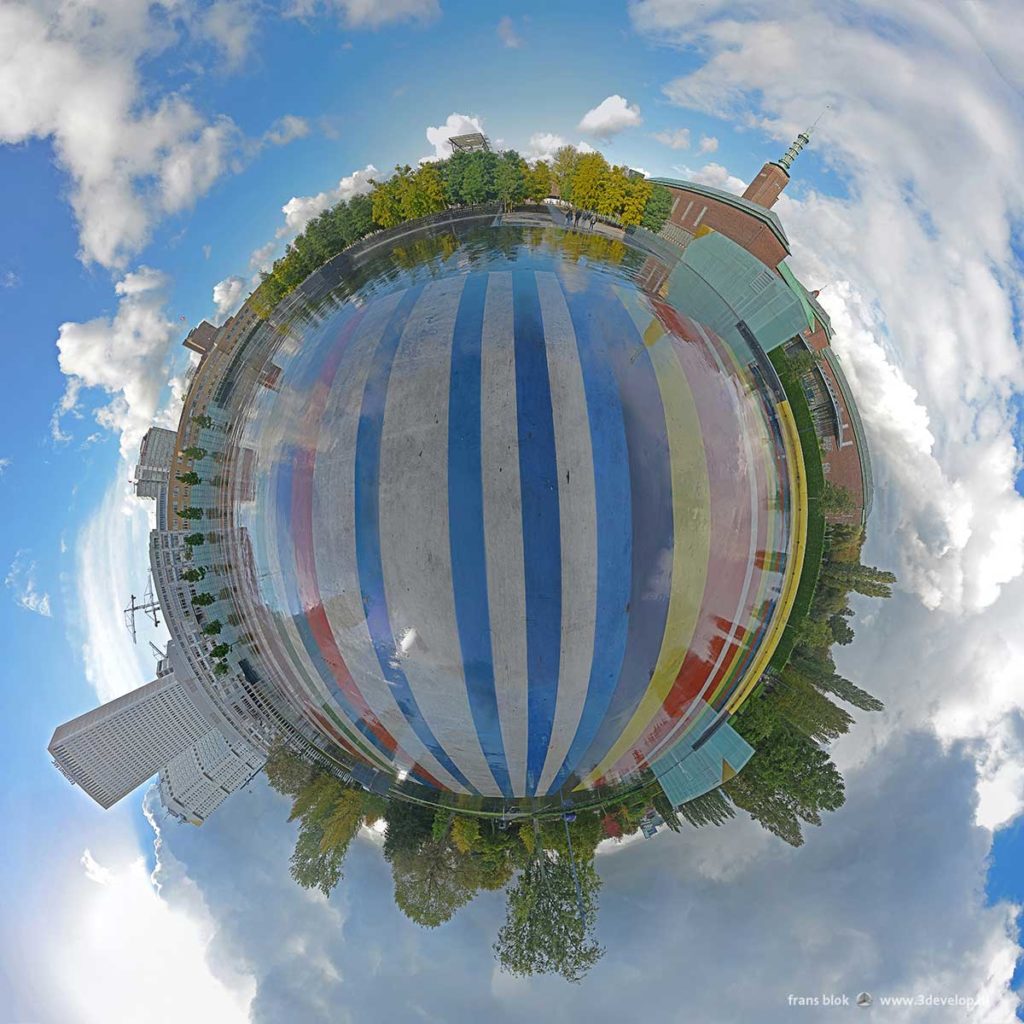
Skyline
Of course this whole procedure doesn’t work exclusively with photographs. Look for example at the spherical version I made of my legendary Rotterdam Skyline. Planet Roffa!

Spherical panorama on the wall
I’ve brought my most beautiful spherical and tubular panoramas together in an album in my webshop, in which they can not only be admired, but also printed on various materials and in many different sizes: